Alvina's post What I'd like to try/learn reminded me of the lists we made a while ago. On it we put done all the things we wished to accomplish--selfishness and hubris completely encouraged. I know they are pipe dreams, but dreaming is half the fun. Here are ten of them:
1. Be able to do a handstand effortlessly, with abs of steel.
2. Have at least one of my books become a classic, beloved by generations and never go out of print.
3. Be an illustrator for a Children's Book Week Poster
4. Be an author/illustrator of a Little Golden Book (like Dan Yaccarino's Mother Goose)
5. Decorate a cake (or cupcakes) at a professional level (I want to learn how to pipe frosting flowers!)

6. Be honored at an awards ceremony where I get to get wear a fancy Academy Awards-type dress (like this).
7. Have a nice big studio with skylights (or something like this).
8. Stand on the Great Wall of China and pat the heads of the lions on the Marco Polo Bridge.
9. Have one of the characters of my book made into a statue placed in a public space/park (like the Make Way for Ducklings statue or the Alice in Wonderland Statue)
 10. Own a successful children's bookstore/bakery/gallery.
Hmm, looking over my list I'm starting to feel pangs of guilt over my narcissism. I want world peace and an end to global warming too! Though, truthfully, I would trade everything on this list for Robert to be healthy and for us to have a real chance to live the life we've always dreamed.


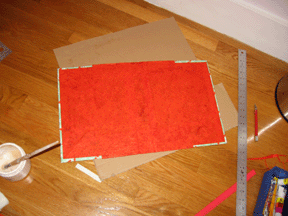
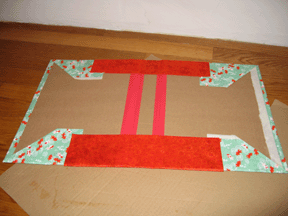
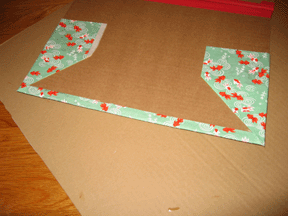 6. Fold the flaps (with the glued down corners) over the pieces of cardboard. Glue flaps down.
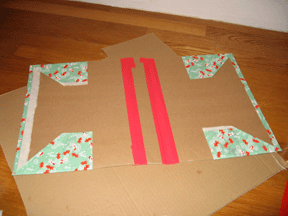
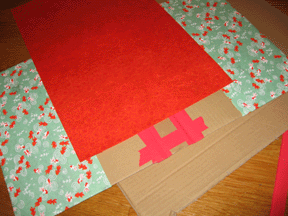
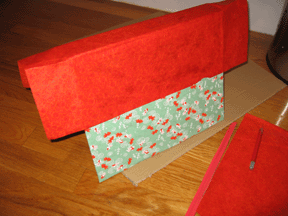
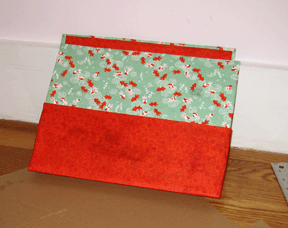
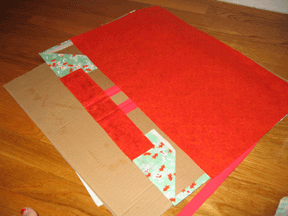 10. Take the remaining paper and cut it so it is about 1/2 smaller on all sides than your folder. It should be large enough to cover all exposed cardboard and overlap the glued paper--but it should NOT overhang.